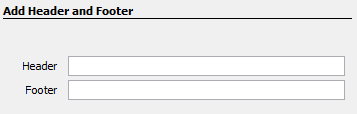
The Add Header and Footer Job is used to add headers and footers to PDF files. The wizard allows to create a simple header or footer that is centered horizontally on PDF documents pages.
- Header - Enter the text for a centered header.
- Footer - Enter the text for a centered footer.
See Add Headers and Footers which offers more options than the Wizard.
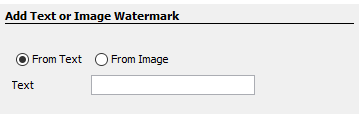
The Add Watermark Job is used to add text or images watermark to PDF files. The wizard allows to create a simple watermark from text or an image file centered on PDF documents pages.
- Choose if the watermark is created From Text or From Image by selecting the appropriate radio button.
- Text - Enter the text for the watermark.
- Image File - Choose an image file.
See Add Watermarks which offers more options than the Wizard.
The Clear Security Job is used to remove permissions and passwords in PDF files. This Job is very simple as there are no options on how to clear the security. After the security is cleared, there are options for routing of the output file after optionally changing its name. The tab has the following sections:
- Unlock Permissions - Use this section to enter a password to open the document if the document is password protected. If the document is not password protected, leave this section un-selected.
![]()
See Clear Security which offers more options than the Wizard.
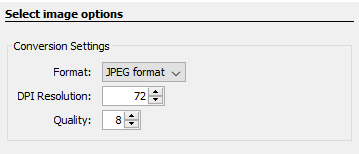
The Convert to Images Job is used to convert a PDF document to a series of images.
- Select Image Options - Set the output format of the image files and other options, such as the output DPI and JPEG compression quality.
See Convert to Images which offers more options than the Wizard.
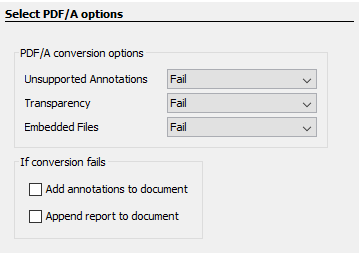
The Convert to PDF/A job allows to PDF documents to the PDF/A sub-format for archiving. The basic wizard options allow to set some options when converting PDF to PDF/A.
- PDF/A conversion options - The section has the following options:
- Unsupported Annotations - Choose whether to "Delete" any unsupported annotations or to "Fail" (i.e. do not convert the original PDF to PDF/A).
- Transparency - Choose whether to "Remove" any transparency in the document or to "Fail" (i.e. do not convert the original PDF to PDF/A).
- Embedded Files - Choose whether to "Delete" any embedded file in the document or to "Fail" (i.e. do not convert the original PDF to PDF/A).
- If conversion fails - Use this section to set the settings to apply when the conversion of the document to PDF/A fails:
- Add annotations to document - Check this box to add annotations when there were specific issues with the document that prevented it from being converted to PDF/A.
- Append report to document - Choose this box to add a report at the end of the document with issues that prevented it from being converted to PDF/A.
See Convert PDF to PDF/A which offers more options than the Wizard.
This job is used to convert text documents to PDF. The basic wizard options allow to define the format of the new PDF document:
- Page Size
- Margins
- Font

See Convert Text to PDF which offers more options than the Wizard.
The Convert Word to PDF job allows to convert Microsoft® Word documents to PDF. The basic wizard options allow to set the security options on the output PDF document.
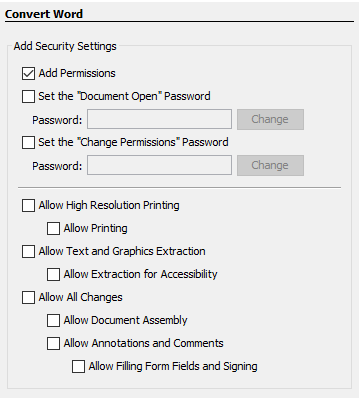
- Add Security Settings - Use this section to set the security settings to apply before saving the resulting PDF document. The section has the following options:
- Add Permissions - Check this box to add security and permissions to the output PDF document. Then fill the options below.
- Set the "Document Open" Password - The "Open" password is required to be able to open the document.
- Set the "Change Permissions" Password - The Permissions password is required to change the permissions of a document.
- Permissions - Permissions are a set of flags that allow or disallow performing various functions with the document, such as printing, extracting content, etc..
See Convert Word to PDF which offers more options than the Wizard to export files to images or send them to the printer
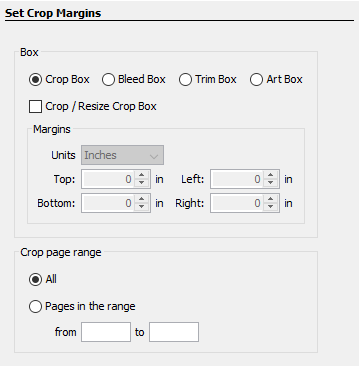
The Crop/Resize Pages Job is used to crop PDF documents. The wizard has options to modify the Crop, Trim, Bleed, and Art boxes and to also specify the page range that should be modified.
- Crop/Resize Pages - Use this section to enter the new margins for the document. When the radio button is selected, you must mark the check box to enable the margin fields.
See Crop Page Job which offers more options than the Wizard.
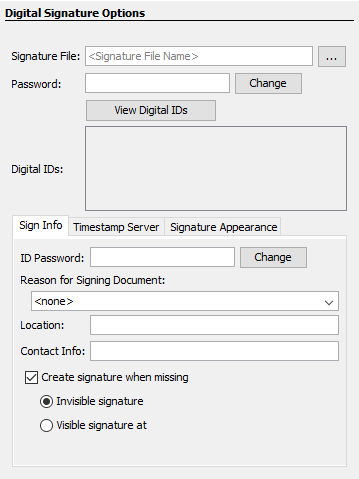
The Sign PDF Job is used to digitally sign PDF documents as they are received. The Digital Signature wizard options are used to enter the settings for signing the documents:
- Signature File - Choose the .pfx or .p12 file that contains your digital signature ID.
- Password - Enter the password for your signature file and then press View Digital IDs to open the signature file and display all the digital IDs stored in the file.
- Digital IDs - Select in the Digital IDs table the digital
ID that you would like to use to sign PDF documents. The first
ID will be selected by default.
- ID Password - Enter the password for the selected digital ID.
- Reason for Signing Document - Choose a reason for signing the document from the combo box or type in your own text
- Location- Enter the location where the document was signed.
- Contact Information - Enter your contact information.
- Create signature when missing - Check this box if you would like a signature to be dynamically created when the document doesn't have any existing signature field.
- Create invisible signature - The signature created will not be visible on any page of the PDF document.
- Create visible signature - The signature will be created on a given page of the PDF document (First Page, Last Page or Given Page) at a given location (x, y, width, height).
See Digitally Sign PDF which offers more options than the Wizard.
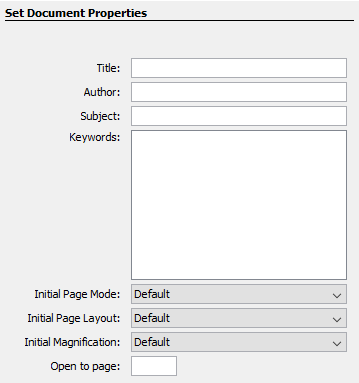
The Edit Document Properties Job is used to modify the document property information. The options available when editing document properties are as follows:
- Set Document Properties - Use this section to enter the Title, Author, Subject, and Keywords for the document.
See Edit Document Properties which offers more options than the Wizard.
The Export Annotations Job is used to extract annotations from interactive PDF documents. The options available when extracting annotations are as follows:
- Export Annotations - Choose the export format (.fdf, .xfdf)
See Export Annotations which offers more options than the Wizard.
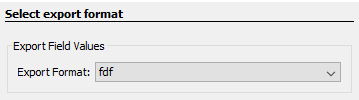
The Export Field Values Job is used to extract field values from interactive PDF forms. The options available when extracting field values are as follows:
- Export Field Values - Choose the export format (.fdf, .xfdf, .xdp, .xml)
See Export Field Values which offers more options than the Wizard.
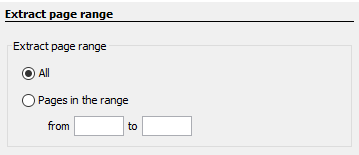
The Extract Text Job is used to extract text from PDF documents to text files. The options available when extracting text are as follow:
- Extract Range - Use this section to specify the range of pages to extract text from.
See Extract Text which offers more options than the Wizard.
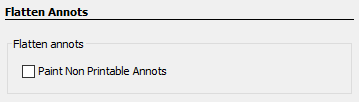
The Flatten Fields Job is used to flatten annotations in PDF documents. The options available when flattening fields are as follow:
- Paint Non Printable Annotations - Check this box to paint non printable annotations in the output flattened PDF document.
See Flatten Annotations which offers more options than the Wizard.
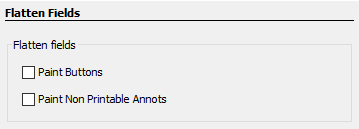
The Flatten Fields Job is used to flatten fields in PDF interactive forms. The option available when flattening fields are as follow:
- Paint Buttons - Check this box to paint button fields in the output flattened PDF document.
- Paint Non Printable Fields - Check this box to paint non printable fields in the output flattened PDF document.
See Flatten Fields which offers more options than the Wizard.
The Import Annotations Job is used to add annotations to a PDF. The options available when importing annotations are as follows:
- Import Annotations - Annotations File - Enter the path to the source annotations file that annotations should be imported from.
See Import Annotations which offers more options than the Wizard.
The Import Field Values Job is used to merge form data with an interactive PDF form. The options available when importing field values are as follows:
- Import Field Values - Merge PDF - Enter the path to the source PDF form that the fields values should be imported to.
See Import Fields which offers more options than the Wizard.
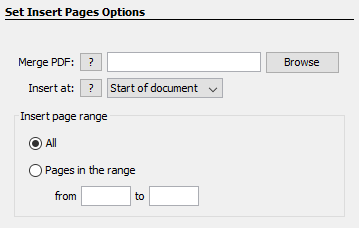
The Insert Pages Job is used to insert PDF pages into PDF documents when they are processed. The options available when inserting PDF pages are as follows:
- Merge PDF - The merge PDF contains the pages to insert.
- Insert Location - The insert location specifies where to insert in the document that is processed.
- Page Range - The page range let's you specify which pages from the merge document to insert.
See Insert Pages which offers more options than the Wizard.
The Move Files Job is used to move files that require no PDF specific processing. There is no information that can be entered in the wizard. Create the new Job then Edit the Job Properties to view the available options for this Job type.
The Optimize PDF Job is used to reduce PDF file size. The wizard will create an optimize PDF job that uses standard default optimization options.
- There are no specific options to enter in the wizard, standard optimization options are automatically set.
- See and edit default optimization options in the Optimize PDF
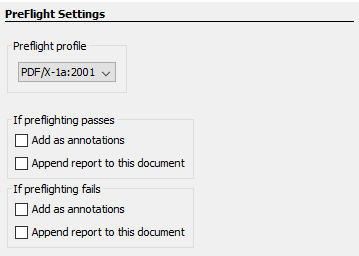
This job is used to verify document compliance PDF/X standards. The options available for this job are:
- PDF/X standards- Use this to choose which standard to use when testing document compliance:
- PDF/X-1a:2001 - ISO 15930-1
- PDF/X-1a:2003 - ISO 15930-4
- PDF/X-3:2002 - ISO 15930-3
- PDF/X-3:2003 - ISO 15930-6
- Add as annotations - If checked, any preflighting compliance issues will be annotated on the document.
- Append report to this document - If checked, a compliance report will be appended as a new page.
See Preflight which offers more options than the Wizard.
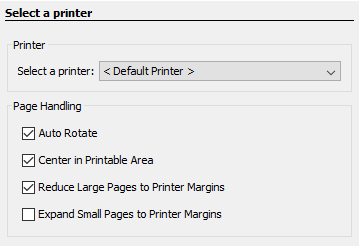
The Print PDF Job is used to send PDF documents to a printer as they are received. The options allow the user to set different job properties such as choosing the printer to send the document to, setting page ranges and more:
- Printer - Choose the printer to send the documents to. The list will display all the printers that are visible to Qoppa PAS service. Optionally, PAS can send the document to the printer marked as default. Note that on Windows, If you are trying to connect to a network printer and the printer doesn't show as an option in the printers list, change Qoppa PAS service to log on as a user account instead of the default local system account.
- Page Handling - Use this section to tell PAS how to handle matching the PDF pages to the printer's physical pages. The available options in this section are:
- Auto Rotate - PAS will look at the PDF page and compare it to the printer's page to determine automatically if it needs to print in portrait or landscape mode.
- Center in Printable Area - If the PDF page is smaller than the physical paper, PAS will center the output on the paper.
- Reduce Large Pages - If the PDF page is larger than the physical paper, PAS will reduce the size of the output to match the printable area.
- Expand Small Pages - If the PDF page is smaller than the physical paper, PAS will enlarge the output so that it fills the printable area.
See Print PDF Files which offers more options than the Wizard.
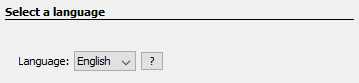
The Recognize text using OCR job allows to recognize and add text into scanned PDF documents.
- Language - Select the language to use when recognizing text.
See Recognize Text Using OCR which offers more options than the Wizard.
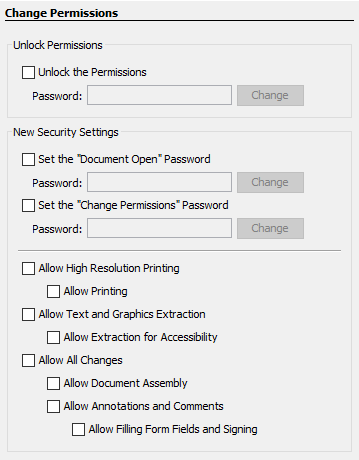
The Change Permissions Job is used to set the permission settings of a PDF file. This wizard allows you to set the options for the permissions.
- Unlock the Permissions - Use this section to enter passwords to open the document if the document is password protected. If the document is not password protected, leave this section un-selected.
- New Security Settings - Use this section to set the security settings to apply before saving the document. The section has the following options:
- Set the "Open" Password - The "Open" password is required to be able to open the document.
- Set the "Permissions" Password - The Permissions password is required to change the permissions of a document.
- Permissions - Permissions are a set of flags that allow or disallow performing various functions with the document, such as printing, extracting content and what modifications are permitted.
See Set Passwords & Permissions which offers more options than the Wizard.
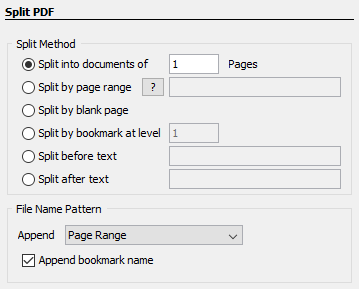
The Split PDF Job is used to split PDF documents into multiple documents as they are received. The options allow to split incoming documents by page count, page range, bookmarks, blank page or search text.
- Split Method - Use this section to tell PAS how to split the document into multiple documents. The available options in this section are:
- Split into documents of - Use this method to split the document into equal size documents of a given number of pages. Enter the page count in the text field.
- Split by page range - Use this method to split the document into multiple documents based on page range. Enter the page range in the text field. Dash is used for a page range, comma to separate pages within the same document, semicolon to separate documents. So for instance, 1,3-5;7-10 will output 2 documents, the first document with page 1,3,4,5, the second document with page 7,8,9,10.
- Split by blank page - Use this method to split the document when a white page is encountered. The white page will be used as a separator between documents and will be dismissed.
- Split by bookmarks - Use this method to split the document based on bookmark at level 1. You can also choose the split up to a higher level, for instance up to level 3; in this case the document will be split at bookmark level 1, level 2 and level 3. In this method, we assume that the bookmark contain go to page action within the PDF document itself and that bookmarks have been created in ascending page order.
- Split by text - Use this method to split the document when specific text in the document is encountered. When the text is encountered in page, this page will set as the first page of the next document.
- File Name Pattern - Use this section to tell PAS how to name the output PDF files (the PDF documents obtained by splitting the incoming document):
- Append - For each output PDF file, you can choose to append the page range or an incremental counter starting at any given number. PAS will start with the original PDF file name (note that the original PDF file name can first be altered using PAS file renaming options).
- When the "page range" option is chosen, PAS will append a string containing the page range for instance test_p4-p6.pdf. When the "split by page range" method was selected, the page range formula will be appended as a string, for instance test1,3-5;7-10.pdf.
- When "incremental counter" option is chosen, PAS will append an incremental counter. The counter will be reset for each new incoming PDF file.
- Append bookmark name - This option is only available when the "split by bookmarks" method was selected. This will append the name of the starting bookmark to the output documents names. So for instance if "Cover Page" is the first bookmark name, the first output document will could be named test_p1-p1_CoverPage.pdf. Only lower case letters, upper case letters and numbers will be preserved in the bookmark name to guarantee that all operating systems will accept this file name.
See Split PDF which offers more options than the Wizard.